Links
Demo: https://veet.acerohernan.com
Github: https://github.com/acerohernan/veet
Overview
I’ve always been amazed seeing how Google Meet allows us to communicate with people from all over the world, so I decided to make an open source project that replicates its functionality and allows to scale to the maximum number of users as possible.
Features
The main goal of the project is to be a scalable video conferencing application, and to accomplish it I needed to separate the features like this:
- Allow participants to create a call from anywhere in the world.
- Allow participants to have bi-directional communication in real-time with the server.
- Allow participants to send and receive media (audio and video) from all the participants connected in the room.
- Allow participants to see all the connected participants in real-time.
Technical Challenges
As we know, every feature that needs to be implemented comes with the responsibility of evaluating trade-offs for each possible solution. In this case, I had the next difficulties:
- A server-side application that can scale horizontally using a stateful protocol like web sockets.
- Capacity to deploy many servers in different regions worldwide closer to the end user.
- Load balance real-time messages to avoid overload the server hosting the room
System Design
Once I had the features that I wanted to implement and all the technical challenges that I needed to be aware of, I started creating a cloud-agnostic system design for defining all the components that the application will need.
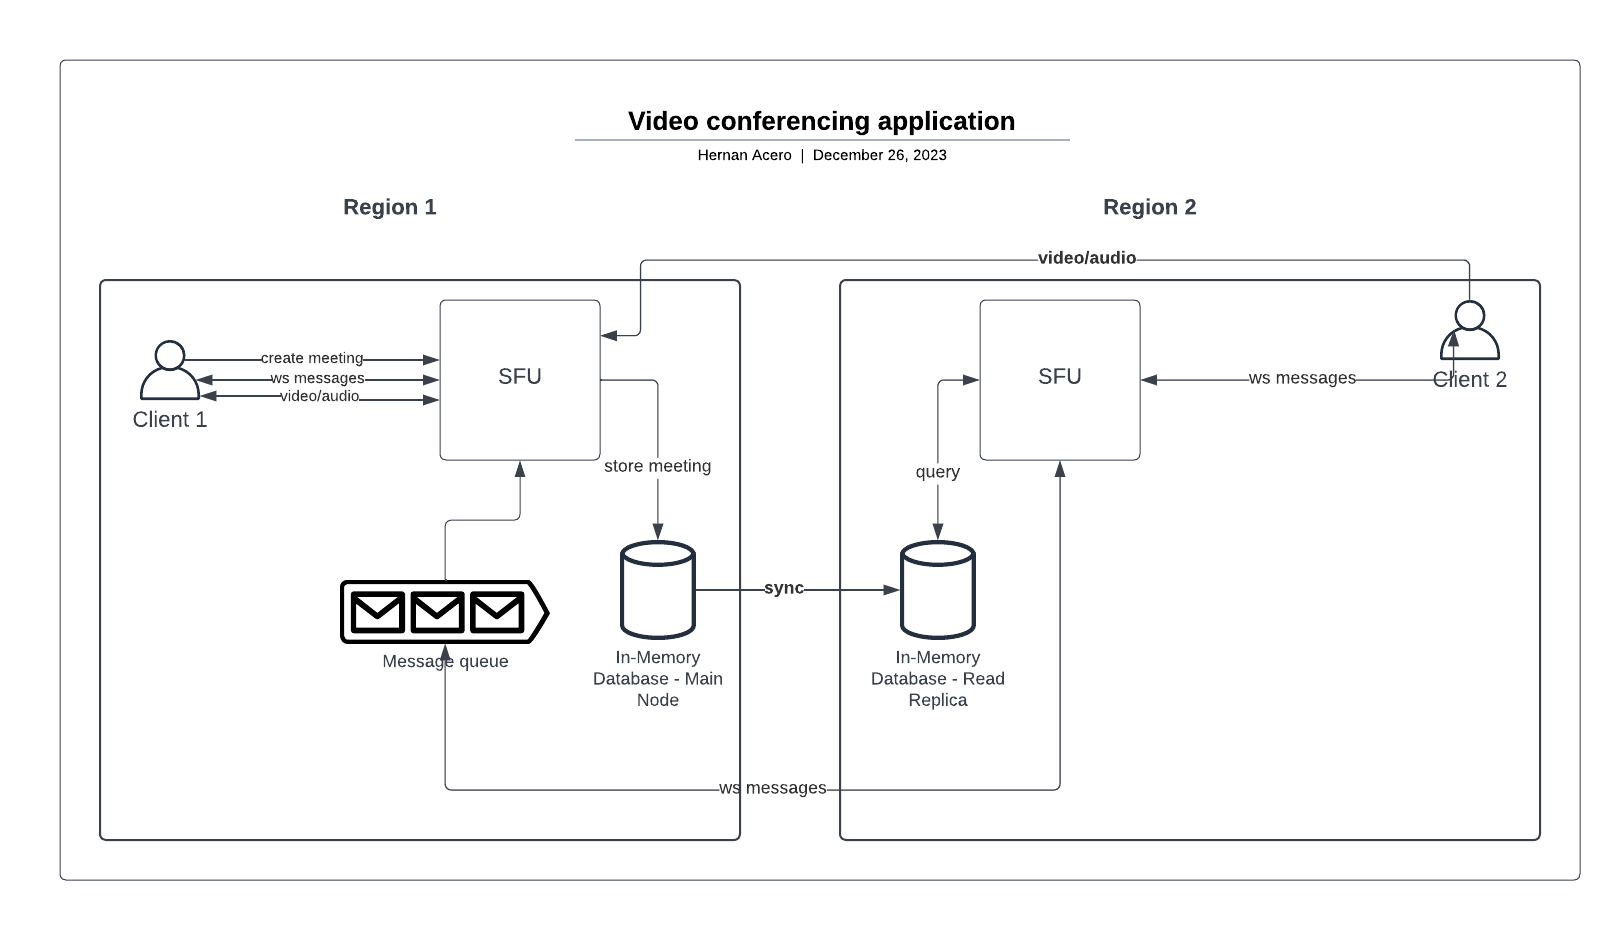
- Client: A performant front-end application that can provide a good user experience and support the communication with the server.
- SFU: The Selective Forwarding Unit, is the principal component that is the server in charge of keeping the state of all connected participants and forwarding all the real-time messages, audio, and video to everyone.
- In-memory Database: For real-time communication, I needed a fast and efficient database that can store all the state that I wanted to share across all servers, for example, which one is hosting a specific room or which one has a connection with a specific participant. Knowing that the state doesn’t need to be persistent and it has to be only available while a room is active, I chose to use an in-memory database like Redis.
- Message Queue: For having the ability to scale each server horizontally and support the maximum amount of participants connected at the same time in a specific room, each server will be subscribed to a specific queue that will receive real-time messages from other servers. This approach will allow balance the load of incoming messages avoiding overloading the server.
AWS System Design
After the system design is completed it’s time to choose the cloud provider and what components will help me create the infrastructure.
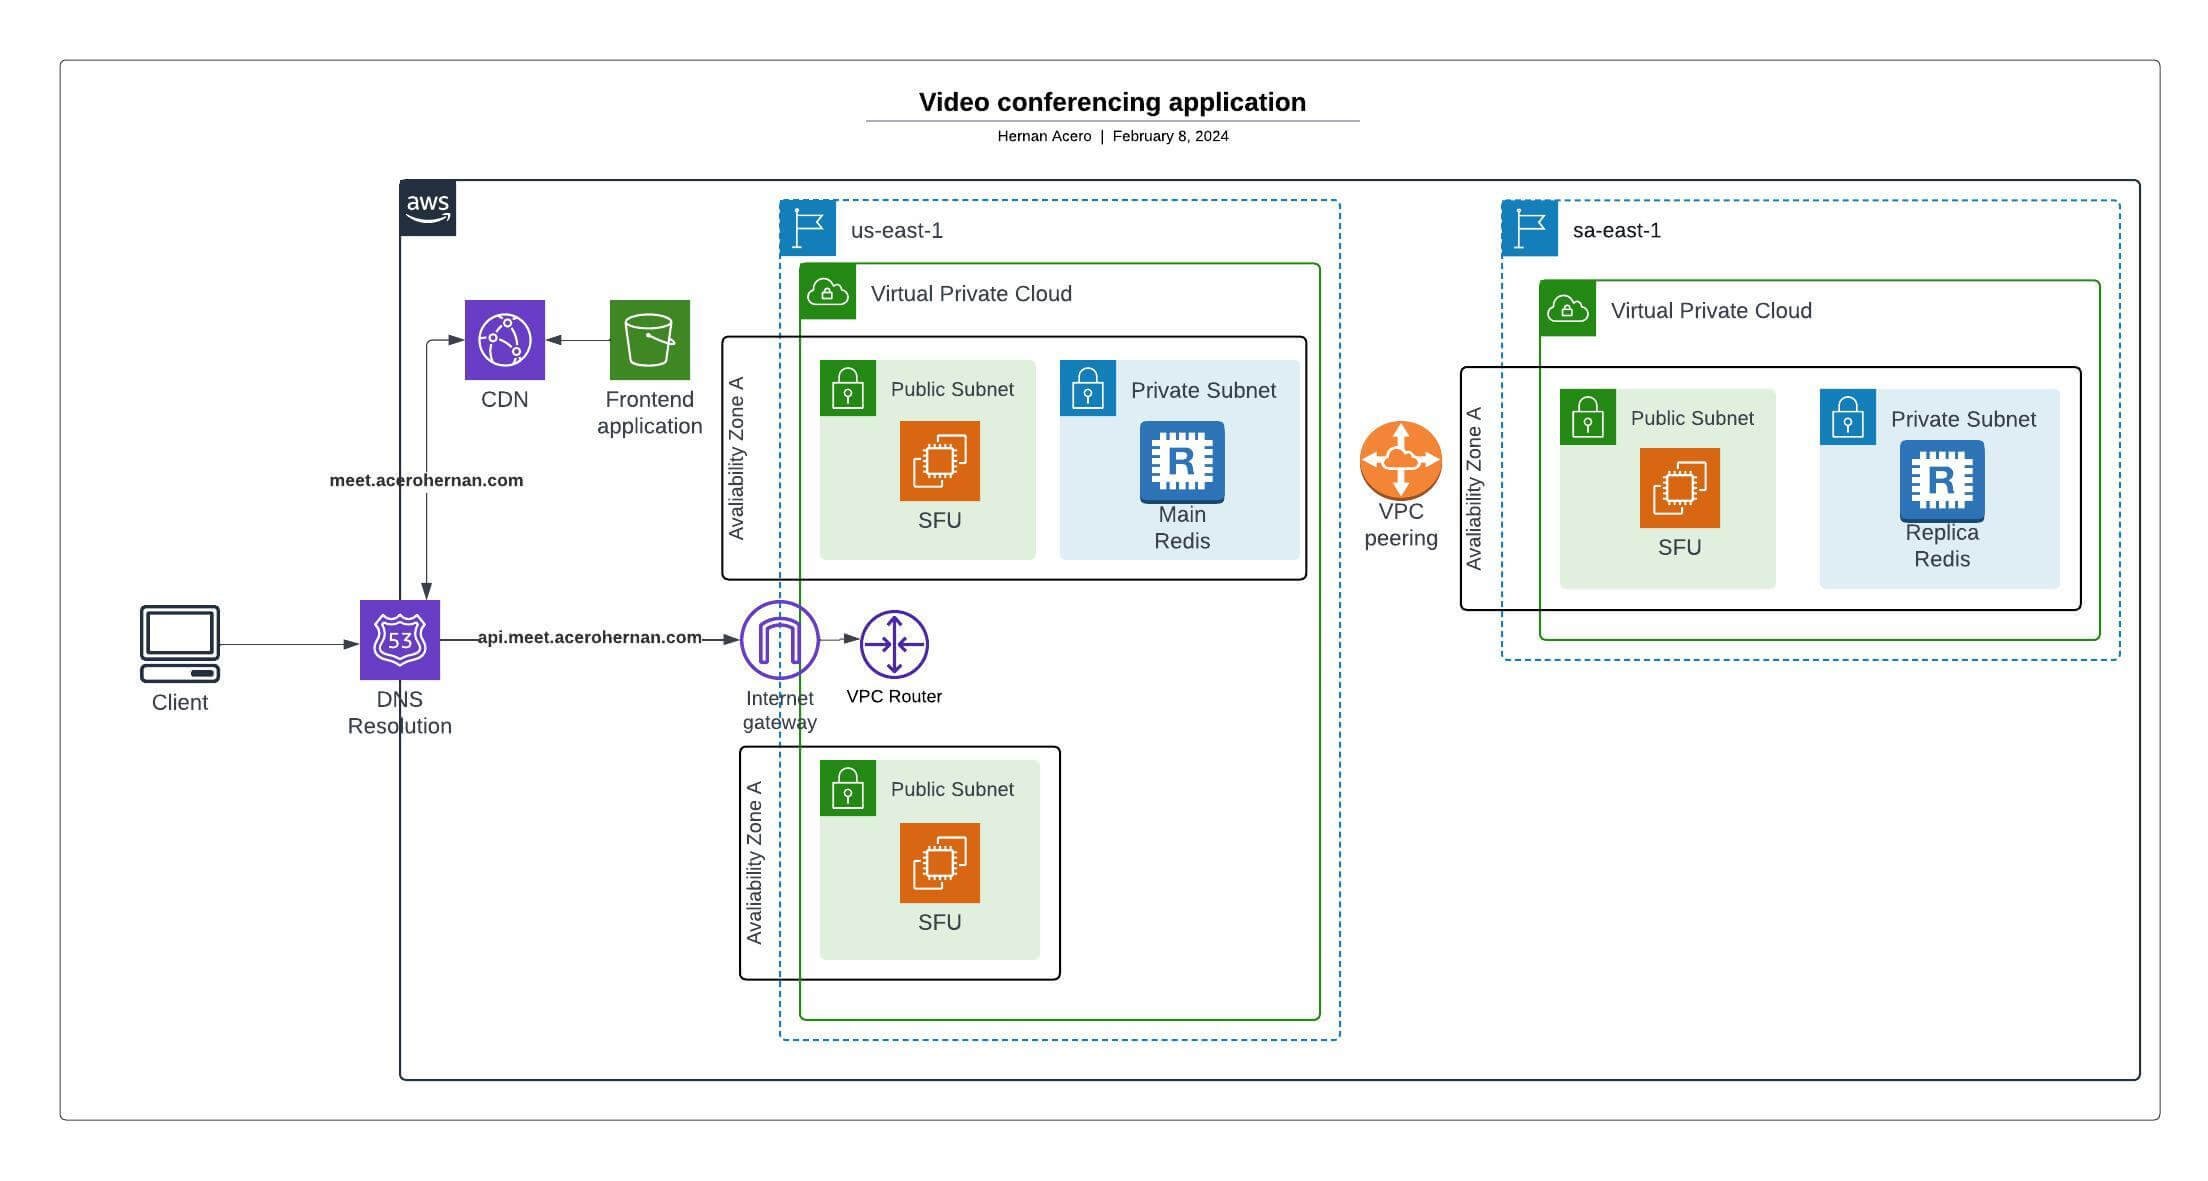
This diagram shows all the principal infrastructure components for deploying the system to AWS. Now, I will explain why I chose them.
First, the entry point for everything will be Route53 for DNS resolution.
Second, the frontend application will be an SPA (Single Page Application) so its bundle will be stored in an S3 bucket and delivered worldwide with CloudFront.
Third, for hosting the server, I’ll need to create a VPC (Virtual Private Cloud) for the main region with all the required components to communicate the instance with the internet (Internet Gateway, VPC Router, Load balancer, ECS Cluster). I didn’t include the load balancer and ECS cluster in the diagram to simplify it. Furthermore, to ensure the availability of the service, I can deploy other instances of the server in another availability zone and connect it to the load balancer to use them as a failover.
Fourth, the message queue and the in-memory storage will be provided by ElastiCache for Redis, which supports the storage and pub/sub functionality. To use it, I’ll create an Elasticache cluster for deploying a master Redis instance, and depending on the throughput, we can scale it vertically until we need to distribute the read load with other read replicas in other regions.
Finally, for scaling to other AWS regions, we can deploy other VPC’s and connect them with the main region VPC with a VPC peering connection, this will allow our servers within the other region to connect to the main Redis instance. Like I said before, If the Redis instance can’t be scaled vertically, we can create a read-replica for distributing the load in other regions.